Quick-start Developer’s guide
Here we will introduce how to setup Apollo on your server. In general, there are two modes of deploying Apollo.
There is “development mode” where the application is launched in a temporary server (automatically) and there is
“production mode”, which will typically require an external separate database and tomcat server where you can deploy the
generated war file.
This guide will cover the “development mode” scenario which should be easy to start. To setup in a production environment, please see the setup guide.
Java / JDK
You have to install Java and the Java Development Kit (JDK) 7 or higher to run Apollo. Both the Oracle and OpenJDK versions have been tested.
Node.js / NPM / Bower
You will need to install node.js, which includes NPM (the node package manager) to build Apollo.
Once node.js / npm is installed, install bower using (you may need sudo):
npm install -g bower
Grails / Groovy / Gradle (optional)
Installing Grails (application framework), Groovy (development language), or Gradle (build environment) is not required (they will install themselves), but it is suggested for doing development.
This is most easily done by using SDKMAN (formerly GVM) which can automatically setup grails for you.
curl -s http://get.sdkman.io | bashsdk install grails 2.5.5sdk install gradle 2.11sdk install groovy
Get the code
To setup Apollo, you can download our latest release from our official releases as compressed zip or tar.gz file (link at the bottom).
Alternatively you can check it out from git as directly as follows:
- git clone https://github.com/GMOD/Apollo.git Apollo
- cd Apollo
- git checkout 2.X.Y # where X.Y is the tagged version you want from here: https://github.com/GMOD/Apollo/tags
Verify install requirements
We can now perform a quick-start of the application in “development mode” with this command:
./apollo run-local
The jbrowse and perl pre-requisites will be installed during this step, and if there is a success, then a temporary
server will be automatically launched at http://localhost:8080/apollo.
Note: You can also supply a port number e.g. apollo run-local 8085 if there are conflicts on port 8080.
Also note: if there are any errors at this step, check the setup.log file for errors. You can refer to the troubleshooting guide and often it just means the pre-requisites or perl modules failed.
Also also note: the “development mode” uses an in-memory H2 database for storing data by default. The setup guide will show you how to configure custom database settings.
Setting up the application
Setup a production server
To setup in a production environment, please see the setup guide. To setup (as opposed to a development server as above), you must properly configure a servlet container like Tomcat or Jetty with sufficient memory.
Adding data to Apollo
After we have a server setup, we will want to add a new organism to the panel. If you are a new user, you will want to setup this data with the jbrowse pre-processing scripts. You can see the data loading guide for more details, but essentially, you will want to load a reference genome and an annotations file at a minimum:
bin/prepare-refseqs.pl --fasta yourgenome.fasta --out /opt/apollo/data

bin/flatfile-to-json.pl --gff yourannotations.gff --type mRNA \
        --trackLabel AnnotationsGff --out /opt/apollo/data
Login to the web interface
After you access your application at http://localhost:8080/apollo/ then you will be prompted for login information
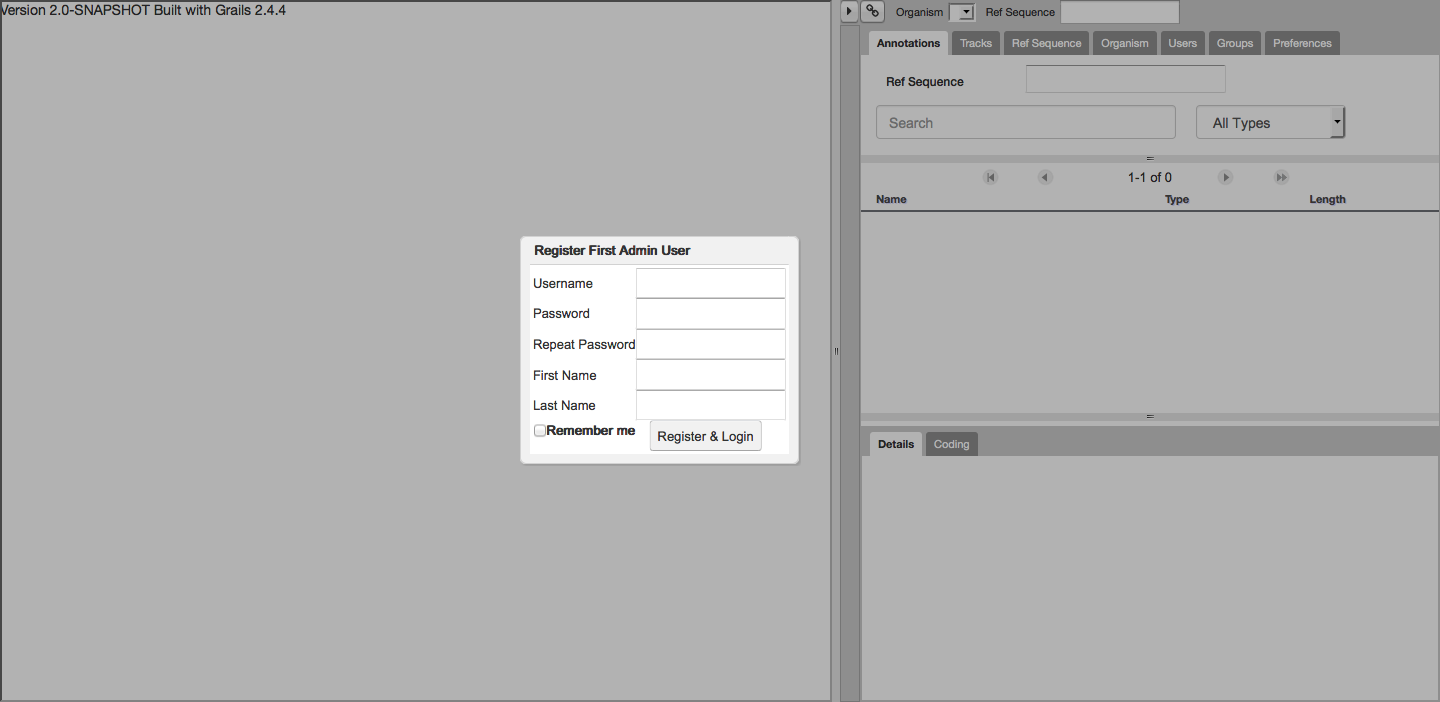
Figure 1. “Register First Admin User” screen allows you to create a new admin user.
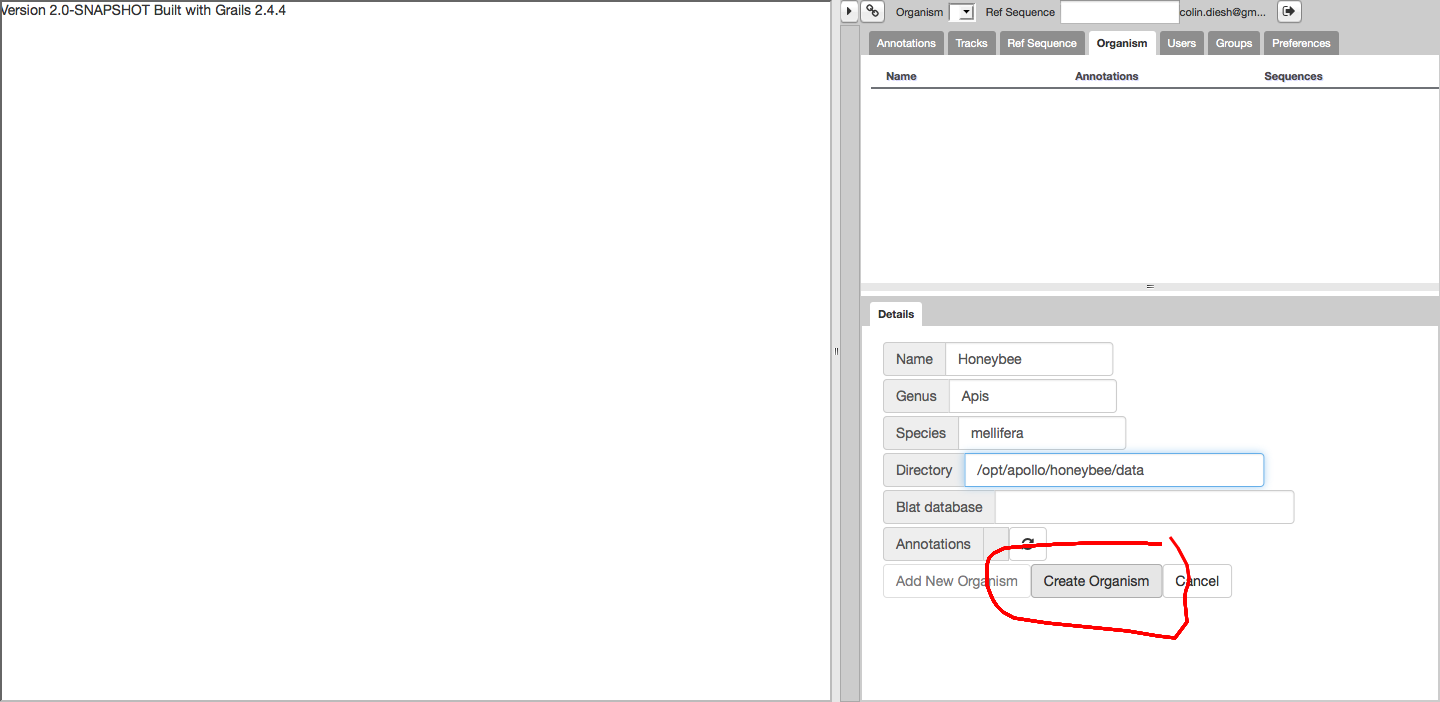
Figure 2. Navigate to the “Organism tab” and select “Create new organism”. Then enter the new information for your organism. Importantly, the data directory refers to a directory that has been prepared with the JBrowse data loading scripts from the command line. See the data loading section for details.
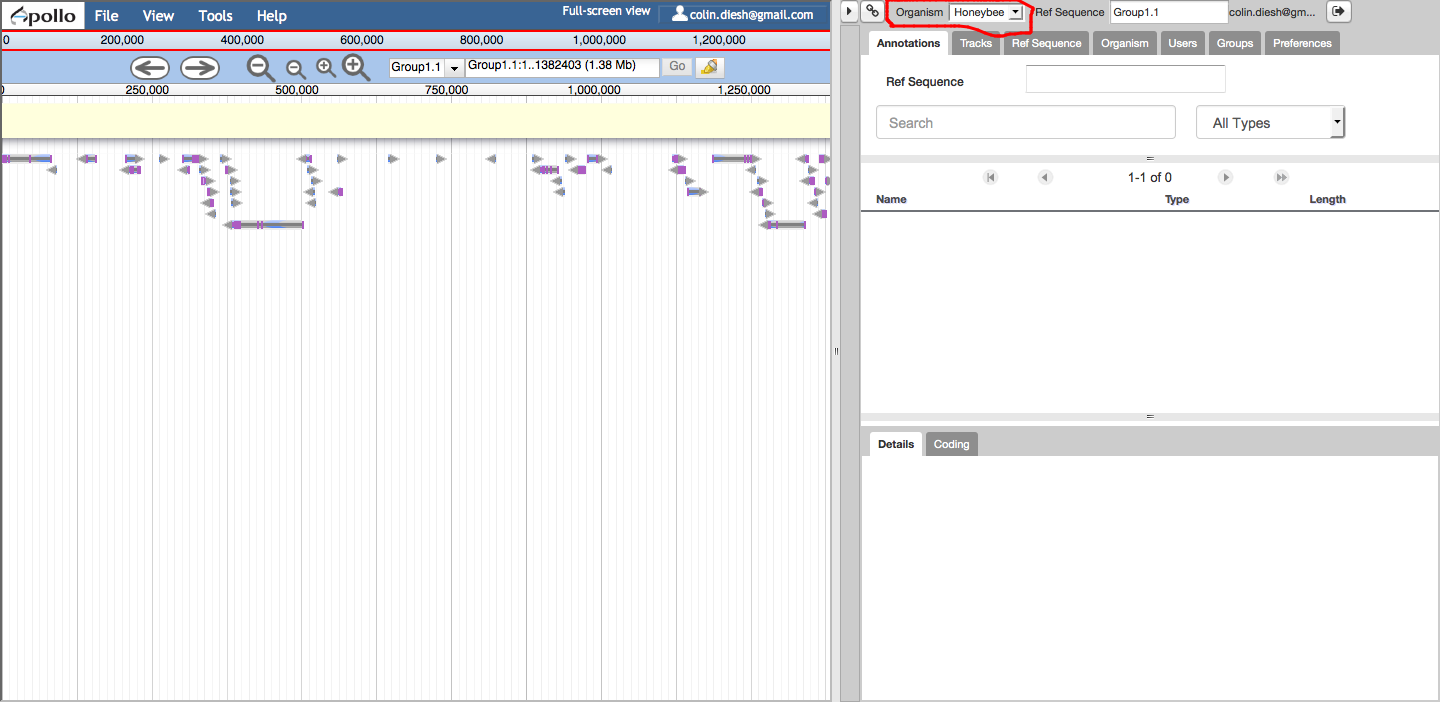
Figure 3. Open up the new organism from the drop down tab on the annotator panel.
Conclusion
If you completed this setup, you can then begin adding new users and performing annotations. Please continue to the setup guide for deploying the webapp to production or visit the troubleshooting guide if you encounter problems during setup.