Developer’s guide
Here we will introduce how to setup Apollo on your server. In general, there are two modes of deploying Apollo.
There is “development mode” where the application is launched in a temporary server (automatically) and there is
“production mode”, which will typically require an external separate database and tomcat server where you can deploy the
generated war file.
This guide will cover the “development mode” scenario which should be easy to start. To setup in a production environment, please see the setup guide.
Java / JDK
You have to install Java and the Java Development Kit (JDK) 8 or higher to run Apollo. Both the Oracle and OpenJDK versions have been tested.
Node.js / NPM
You will need to install node.js, which includes NPM (the node package manager) to build Apollo.
nvm is highly recommended for installing and managing multiple version of Node. Node v6 and up should work, but we recommend Node v8 or better.
Grails / Groovy / Gradle (optional)
Installing Grails (application framework), Groovy (development language), or Gradle (build environment) is not required (they will install themselves), but it is suggested for doing development.
This is most easily done by using SDKMAN (formerly GVM) which can automatically setup grails for you.
curl -s http://get.sdkman.io | bashsdk install grails 2.5.5sdk install gradle 2.11sdk install groovy
Get the code
To setup Apollo, you can download our latest release from our official releases as compressed zip or tar.gz file (link at the bottom).
Alternatively you can check it out from git directly as follows:
git clone https://github.com/GMOD/Apollo.git Apollocd Apollogit checkout <XYZ>- optional, where XYZ is the tagged version you want from here: https://github.com/GMOD/Apollo/releases
Verify install requirements
We can now perform a quick-start of the application in “development mode” with this command:
./apollo run-local
The JBrowse and perl pre-requisites will be installed during this step, and if there is a success, then a temporary
server will be automatically launched at http://localhost:8080/apollo.
Note: You can also supply a port number e.g. apollo run-local 8085 if there are conflicts on port 8080.
Also note: if there are any errors at this step, check the setup.log file for errors. You can refer to the troubleshooting guide and often it just means the pre-requisites or perl modules failed.
Also also note: the “development mode” uses an in-memory H2 database for storing data by default. The setup guide will show you how to configure custom database settings.
Running the code
There are several distinct parts of the code.
- Apollo client plugin (JS: dojo, jquery, etc.) in client directory
- Server (Grails 2.5.5: Groovy and Java) in grails-app, src, web components and tests.
- Side-panel code / wrapper code (GWT 2.8: Java). Code is java and/or XML in src/gwt.
- Tools / scripts in the examples and tools: Groovy, perl, bash
- JBrowse (JS: dojo, jquery, etc.)
In general, the command ./apollo run-local will build and run the client and the server code. Subsequent runs that do not change the GWT code can use ./apollo run-app. Changes to domain objects or adding controller methods may make stopping and restarting the server necessary, but most other changes will compile without having to restart the server.
./apollo test runs the grails unit and integration tests.
Updating the web-service doc can be done with ./apollo create-rest-doc
Running the code for the making client plugin changes
After starting the server you can run ./gradlew installJBrowseWebOnly or ./apollo jbrowse to push changes from the JavaScript code in the client/apollo directory.
If for some reason this is not working then make sure that your network development tab, in your browser console, has disabled caching. You can also run the command ./gradlew copy-resources-dev manually each time instead if the files don’t seem to be getting copied.
Running the code for GWT changes
To use the GWT dev server run gradle devmode in a separate terminal. This will bring up a separate GWT dev-mode code server that will compile subsequent changes to the src/gwt code after reloading the page.
If errors seem to be a little obtuse using the dev compilation, you might try running ./apollo compile to get more detail.
Running the code for JBrowse changes
If you are testing making changes directly to JBrowse within Apollo, the following steps should work:
./apollo clean-all- Clone the version of jbrowse you want into a directory called
jbrowse-downloadas the root level. ./apollo run-localto run the server- In a separate terminal run
gradle copy-resources-devto copy over your changes to the server.
Adding sample data
If you want to test with pre-processed data instead of adding your own you can load the following data into a directory to be added as an organism.
- Yeast from JBrowse sample data 0.5 MB
- Volvox imaginary sample organism from JBrowse 2 MB
- Honeybee without BAM 500 MB
- Honeybee with BAM 17 GB
Using Apollo with IntelliJ
You can use Intellij, NetBeans, Eclipse, or just a simple text editor with Apollo to aid in development.
Here we discuss using IntelliJ Ultimate with Apollo:
- Download IntelliJ Ultimate (you need the commercial version). Licensing options.
- Clone / download Apollo if you haven’t already.
git clone https://github.com/GMOD/Apolloand follow the instructions on building Apollo in this doc. - If you’ve tried to use it before with IntelliJ, make sure that there is no
.ideaor*.iprfile present in the directory. - Open IntelliJ
- Select
Import Project - Select
Create from Existing Sources - After it detects the web-app it should have detected
Web. SelectGrailsinstead. - Note that there is a
Grailsview in the project menu. - Open Terminal and run
./apollo run-localto take care of all the dependencies, including JBrowse. If you aren’t developing GWT, you can use./apollo run-appinstead. Most Java / Groovy files will automatically recompile in a few seconds after you make changes. - You can also run debug or run directly from the IDE with output below.
Notes on Debugging:
- In IntelliJ, run debug (works only for JVM files, debug JavaScript in the browser)
- There is an error in IntelliJ 2017.3 so either downgrade to 2017.2 or disable the Insrumenting agent in
File | Settings | Build, Execution, Deployment | Debugger | Async Stacktracesin the preferences menu.
Create server documentation
Using an IDE like IntelliJ, NetBeans, Eclipse etc. is highly recommended in conjunction with Grails 2.5.X documentation. Additionally, you can generate documentation using grails:
grails doc
Server documentation (for groovy) should be available at target/docs/all-docs.html.
Setting up the application
Setup a production server
To setup in a production environment, please see the setup guide. To setup (as opposed to a development server as above), you must properly configure a servlet container like Tomcat or Jetty with sufficient memory.
Adding data to Apollo
After we have a server setup, we will want to add a new organism to the panel. If you are a new user, you will want to setup this data with the jbrowse pre-processing scripts. You can see the data loading guide for more details, but essentially, you will want to load a reference genome and an annotations file at a minimum:
bin/prepare-refseqs.pl --fasta yourgenome.fasta --out /opt/apollo/data

bin/flatfile-to-json.pl --gff yourannotations.gff --type mRNA \
        --trackLabel AnnotationsGff --out /opt/apollo/data
Login to the web interface
After you access your application at http://localhost:8080/apollo/ then you will be prompted for login information
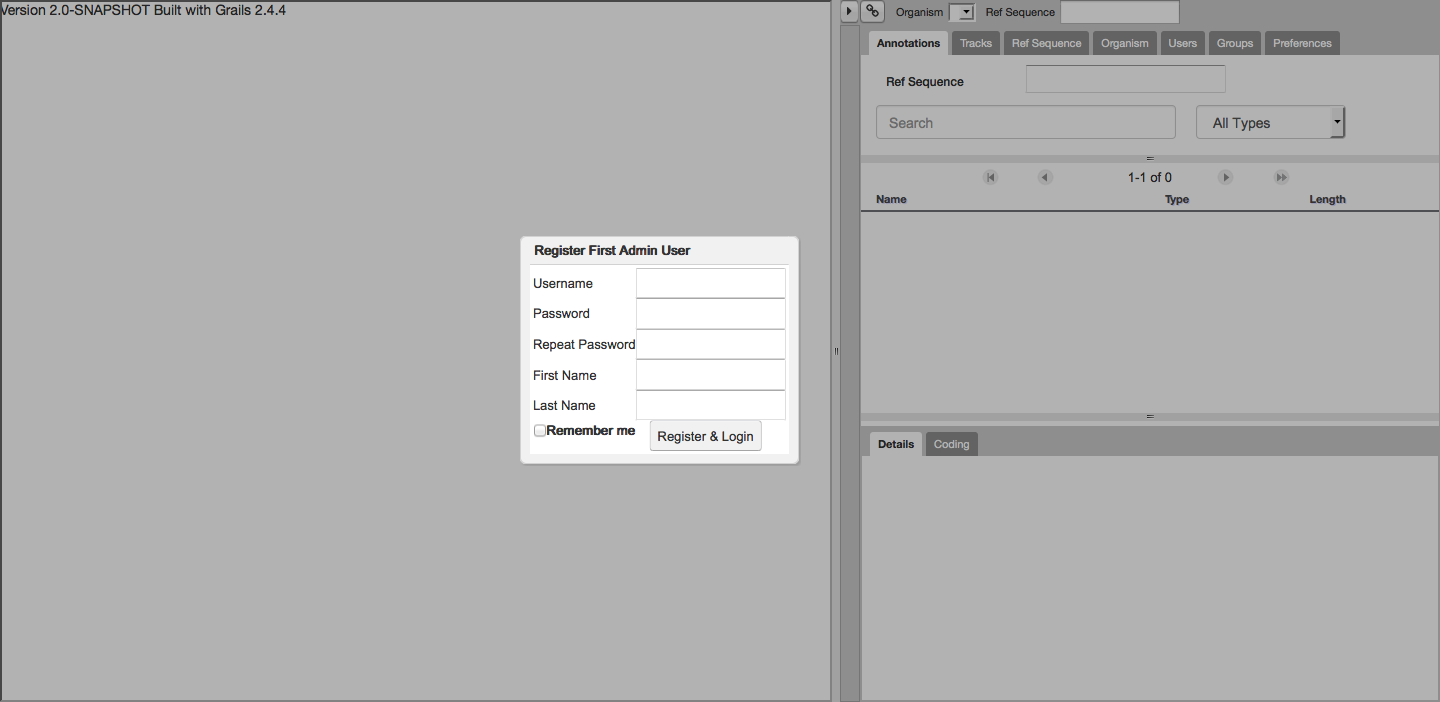 Login first time
Figure 1. “Register First Admin User” screen allows you to create a new admin user.
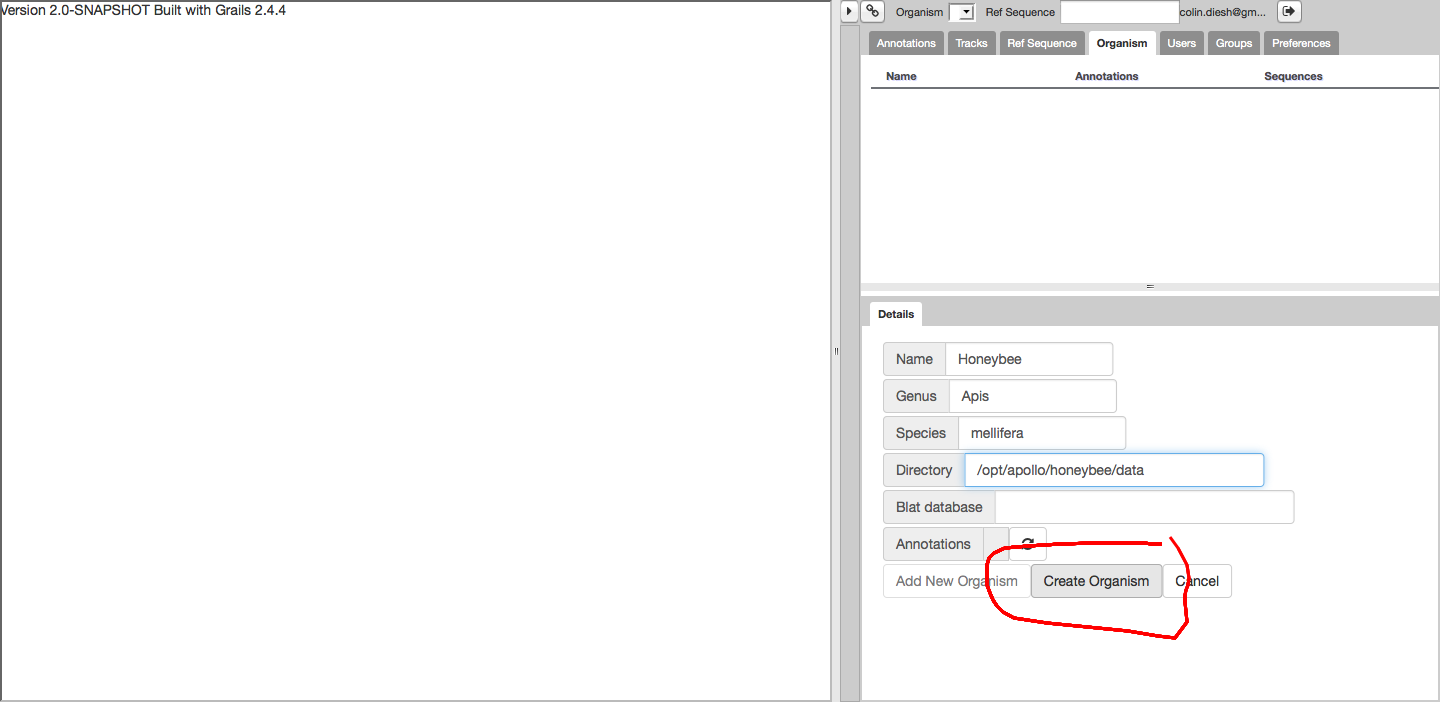 Organism configuration
Figure 2. Navigate to the “Organism tab” and select “Create new organism”. Then enter the new information for your organism. Importantly, the data directory refers to a directory that has been prepared with the JBrowse data loading scripts from the command line. See the data loading section for details.
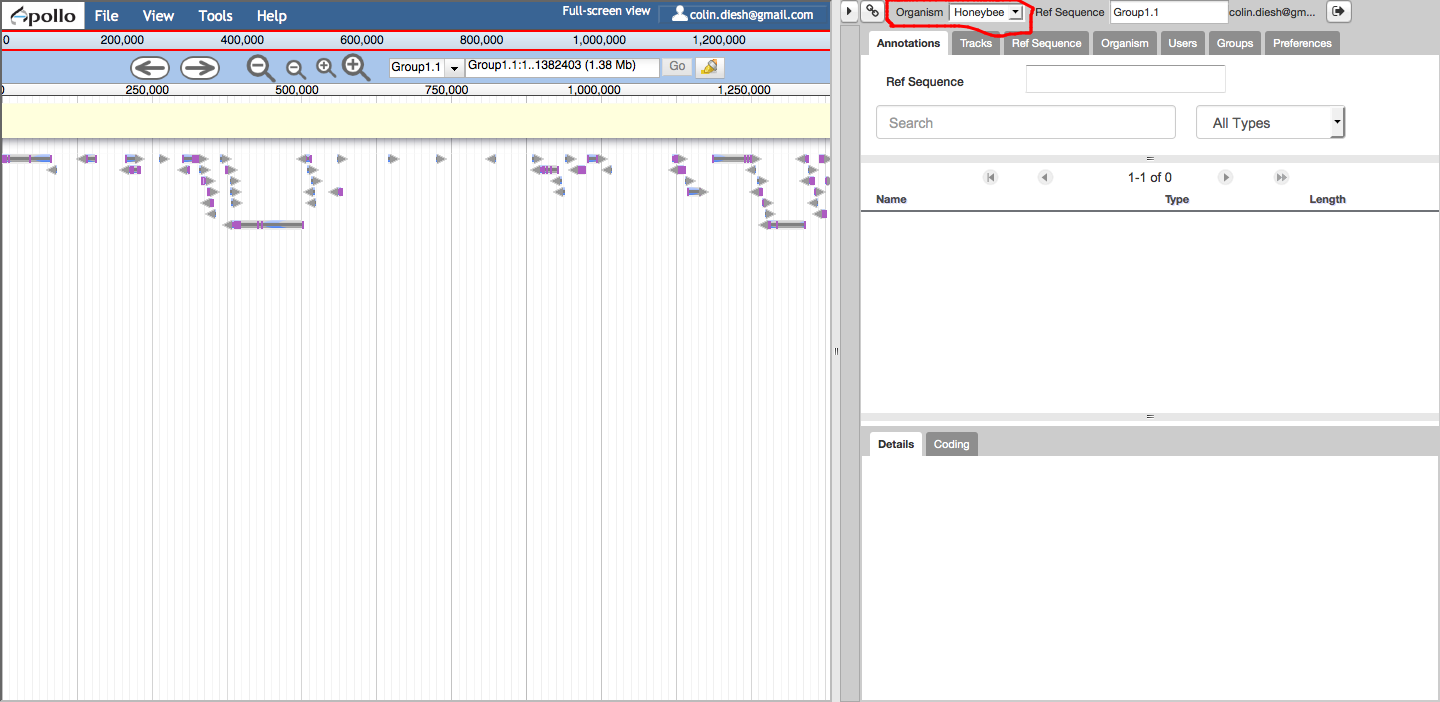 Open annotator
Figure 3. Open up the new organism from the drop down tab on the annotator panel.
Conclusion
If you completed this setup, you can then begin adding new users and performing annotations. Please continue to the setup guide for deploying the webapp to production or visit the troubleshooting guide if you encounter problems during setup.